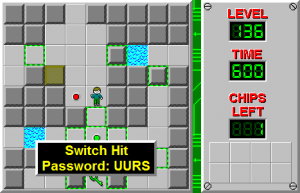
Switch Hit
Switch Hit is the 136th level in Chip's Challenge Level Pack 2. In this level, Chip has to move cloned blocks through toggle walls, opening and closing them to move the blocks to some water spaces, and collecting the level's green key and one of the two chips. The toggle walls, however, create a very difficult challenge, as David Stanley has often been known for creating out of nowhere. The level's name references the baseball term for an ambidextrous batter, thematically recalled in the necessity of "switching hands" throughout the level.

| |
| Level set | Chip's Challenge Level Pack 2 |
|---|---|
| Level number | 136 |
| Designer | David Stanley |
| Password | UURS |
| Chips | 1 required / 2 available |
| Chips notes | 1 inaccessible |
| Time limit | 600 |
| MS (Scores) | |
| Bold time | 423 |
| Public time | 423 |
| Casual difficulty | ***** |
| Bold execution difficulty |
***** |
| Bold routing difficulty |
***** |
| Bold luck difficulty |
***** |
| Lynx (Scores) | |
| Bold time | 343 |
| Public time | 338 |
| Casual difficulty | ***** |
| Bold execution difficulty |
***** |
| Bold routing difficulty |
***** |
| Bold luck difficulty |
***** |
Start by using a block on the green button below, then build 5U and west, and then north, with the next two blocks. Put the third in the same spot, then move it west to the water, and now move a fourth block to the same spot again and a fifth underneath that, and now move block 4 through and touch the button to the left of the dirt. Switch out the wall and move the block 3D LD, swap again, then run all the way southeast. Swap walls and flick the block off, swap again, and this time, click *L-D, thus using the Mouse Panel Glitch, for the second flick.
Since Lynx does not allow for a flick to be used, here Chip must do some extra work to reach the green key. With two additional blocks, fill up the water at [1,18] and [5,20], which will allow Chip to take a block down past the double toggle walls to [10,21].
Play below the block to a green button, then move the block through to the water. Now, use the other block in the same manner, although the Mouse Panel Glitch has done its job and the player does not need to use it a second time (though he/she certainly can), and when the block arrives on the most recent water space, swap again and use it to access the green key to the right. Turn back to water 3 and turn north to reach the level's chip, and now start building to the exit.
Build towards the green button to the right, then south, and now switch the walls as you move the third block through the passageway near the next water below. Flick this block down to the extreme south column, then collect a fourth and fifth block and build towards this row, using this linked block to reach the exit.
Since the 422 route with no mouse is exactly the same otherwise, it is not shown.
Full level mapEdit
WalkthroughEdit
| Previous Level | Current Level | Next Level |
|---|---|---|
| ← Zartacla | Switch Hit | Iron Mysticus → |