Please create an account or Login! Have fun!
Refraction: Difference between revisions
m (Conversion script moved page Refraction to refraction: Converting page titles to lowercase) |
Sharpeye468 (talk | contribs) m (Updated to new level template) |
||
| (4 intermediate revisions by 2 users not shown) | |||
| Line 1: | Line 1: | ||
{{Infobox Level | {{Infobox Level | ||
| | |pack = cc1 | ||
|level = 44 | |level = 44 | ||
| | |image = [[File:Level_44.png|300px]] | ||
| | |||
}} | }} | ||
| Line 27: | Line 12: | ||
==Full level map== | ==Full level map== | ||
[[ | [[File:Cc1_full_map_level_44.png|500px]] | ||
== Walkthrough == | == Walkthrough == | ||
Latest revision as of 04:40, 30 April 2020

| |
| Level set | Chip's Challenge 1 |
|---|---|
| Level number | 44 |
| Designer | Unknown |
| Password | TXHL |
| Chips | 32 required / 32 available |
| Time limit | 300 |
| MS (Scores) | |
| Bold time | 146 |
| Public time | 146 |
| Casual difficulty | ***** |
| Bold execution difficulty |
***** |
| Bold routing difficulty |
***** |
| Bold luck difficulty |
***** |
| Lynx (Scores) | |
| Bold time | 144 |
| Public time | 144 |
| Casual difficulty | ***** |
| Bold execution difficulty |
***** |
| Bold routing difficulty |
***** |
| Bold luck difficulty |
***** |
| Steam (Scores) | |
| Bold time | 144 |
| Public time | 144 |
| Casual difficulty | ***** |
| Bold execution difficulty |
***** |
| Bold routing difficulty |
***** |
| Bold luck difficulty |
***** |
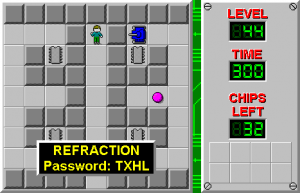
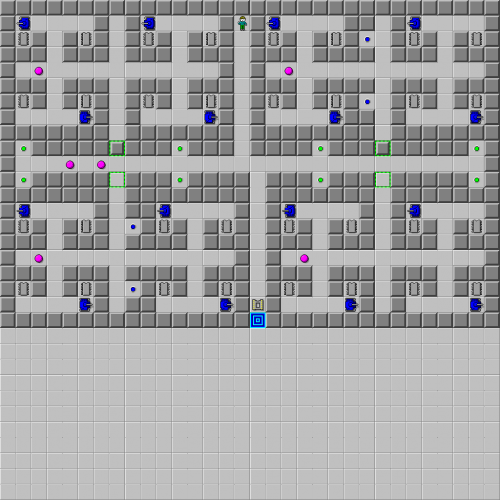
Refraction is the 44th level in Chip's Challenge 1, and named such because the level is completely symmetrical, except for the center corridor; it is "refracted" through the center of the level. Refraction is quite simple although long, and there is one small trick to add a couple extra seconds.
When Chip is following just behind the pink ball on entering a room, then after collecting the first chip in the room, taking the second chip will cause so much delay that collecting the chips on the opposite vertical side is quicker. This is available on the southeast and southwest edges; collecting the chips in normal sequence will lead to 144.
The optimum route is: southeast, northeast, switch tanks, finish northeast, finish southeast (use above trick), northwest, southwest (use above trick), switch tanks, finish southwest, finish northwest, exit.
Full level map[edit]
Walkthrough[edit]
| Previous Level | Current Level | Next Level |
|---|---|---|
| ← Lock Block | Refraction | Monster Lab → |
- Chip's Challenge 1 Levels
- Levels by unknown designers
- Levels with casual difficulty 1 (MS)
- Levels with bold execution difficulty 1 (MS)
- Levels with bold routing difficulty 1 (MS)
- Levels with casual difficulty 1 (Lynx)
- Levels with bold execution difficulty 1 (Lynx)
- Levels with bold routing difficulty 1 (Lynx)
- Levels with casual difficulty 1 (Steam)
- Levels with bold execution difficulty 1 (Steam)
- Levels with bold routing difficulty 1 (Steam)
