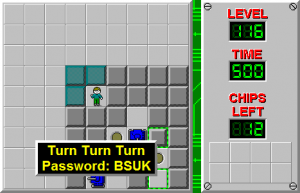
Turn Turn Turn
Turn Turn Turn is the 116th level in Chip's Challenge Level Pack 2. The reason that Turn Turn Turn, one of Dale Bryan's greatest levels, can be very hard to optimize is that Chip has to release some of the pink balls onto three separate tracks, each with a different button type in them. This is a very challenging job to perform at every stage.

| |
| Level set | Chip's Challenge Level Pack 2 |
|---|---|
| Level number | 116 |
| Designer | Dale Bryan |
| Password | BSUK |
| Chips | 12 required / 12 available |
| Time limit | 500 |
| MS (Scores) | |
| Bold time | 425 |
| Public time | 425 |
| Casual difficulty | ***** |
| Bold execution difficulty |
***** |
| Bold routing difficulty |
***** |
| Bold luck difficulty |
***** |
| Lynx (Scores) | |
| Bold time | 412 |
| Public time | 390 |
| Casual difficulty | ***** |
| Bold execution difficulty |
***** |
| Bold routing difficulty |
***** |
| Bold luck difficulty |
***** |
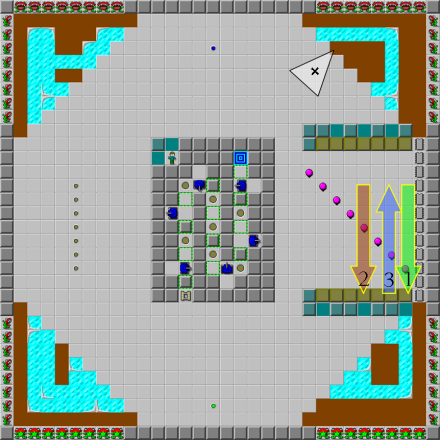
The pathways that send the balls around the level are very hard to map out, and they are built by removing dirt to reveal ice, which allows for very few mistakes. The frequency of button pressing can be very slow, because the tracks to the buttons are very long; blocks allow Chip to markedly increase this frequency, but they must be well-placed, as tanks are included in the final maze to the exit that the balls trigger. A toggle wall may not open in time before a tank reverses onto Chip, or they may block the path ahead while a trap is open. To avoid that, Chip wants the blue button to be pressed at a lower rate, while the toggle switch is to be pressed more often. All in all, Turn Turn Turn is one of the hardest and most complex routes in CCLP2.
The correct arrangement of ice and the ball assignment should look like this:
First, begin in the northeast, moving 5R 4D LDR off dirt 10 (including dirt touching teeth), then pull block 6 all the way to 3U off the start, and begin operations in the northwest. Because this is a hub for balls 1 and 3 at several points in their run, the northwest is important. From dirt 17, move LDLD 4L D 2U R 3D RD 2L UD; ball 3 is now free to run.
Continue running south over dirt 3 in the southwest and then 2D RU 2D LU 2D 2R (using spring slides to use the boosting most efficiently) ULRD 2U R 3D RUD. 2/3 of ball 3's track is now complete, and ball 1 is only blocked by the first dirt in its path. Continue across to the southeast and walk RURUD 3R 4U LURU from dirt 16, and you are now ready to release ball 1.
Get on the other side of block 14 and move it south after ball 1 clears; pushing it now will cause the ball to deflect off the block while Chip tries to turn it, making it take longer to reach its destination. With this route, it will run into the green button at the exact moment Chip gets back to it. Step on the ice created by dirt 2 and continue pushing the block 10L 2D, stopping at the 2L and 5L locations to remove the blue walls under blocks 8 and 11. Retreat back to pick up block 8, stopping after 3D 7L to finish moving block 14 4D, and then stash block 8 6L D away from that.
Ball 3 is now approaching the blue button: shove block 6 into place to permanently trap it, and then run east and knock off dirt 18, marked by a plus sign in the map. This is not required to get any balls into place, but it will distort the rhythm of this ball where Chip wants it, and he has [2] to spare before locking ball 2 into its location. Divert across some unused dirt with D 3R 2D R (this is not marked on the map, since it doesn't make any difference to the balls), take the remaining chips, and shove block 11 5D across the ice corner and 12L 3D to barely catch ball 1. As ball 2 approaches the brown buttons, sneak block 8 D behind it, trapping it between the block and dirt 35 from the northwest.
With all three balls at optimum potential, zigzag through the center; wait until 426 on the last turn upwards, then run all the way to the exit. Notice that the tanks reverse frequently, often killing Chip while he tries to run through apparently open toggle walls; to make the level much easier to complete, decrease the frequency of the blue button.
Full level mapEdit
WalkthroughEdit
| Previous Level | Current Level | Next Level |
|---|---|---|
| ← Counter Clockwise | Turn Turn Turn | CircleMaze → |
