Please create an account or Login! Have fun!
Bea's Den: Difference between revisions
m ((via JWB)) |
mNo edit summary |
||
| Line 1: | Line 1: | ||
{{Infobox Level | {{Infobox Level | ||
| | |pack = cclp2 | ||
|level = 3 | |||
|image = [[File:CCLP2 Level 3.png|300px]] | |image = [[File:CCLP2 Level 3.png|300px]] | ||
}} | }} | ||
Latest revision as of 04:24, 30 April 2020

| |
| Level set | Chip's Challenge Level Pack 2 |
|---|---|
| Level number | 3 |
| Designer | Paul Hobden |
| Password | HYGJ |
| Chips | 16 required / 16 available |
| Time limit | 150 |
| MS (Scores) | |
| Bold time | 109 |
| Public time | 109 |
| Casual difficulty | ***** |
| Bold execution difficulty |
***** |
| Bold routing difficulty |
***** |
| Bold luck difficulty |
***** |
| Lynx (Scores) | |
| Bold time | 107 |
| Public time | 107 |
| Casual difficulty | ***** |
| Bold execution difficulty |
***** |
| Bold routing difficulty |
***** |
| Bold luck difficulty |
***** |
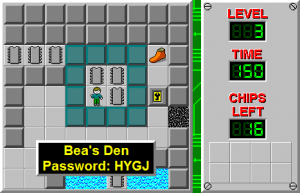
Bea's Den is the 3rd level in Chip's Challenge Level Pack 2. While more of a challenging design and introducing blobs to CCLP2, Bea's Den is not difficult.
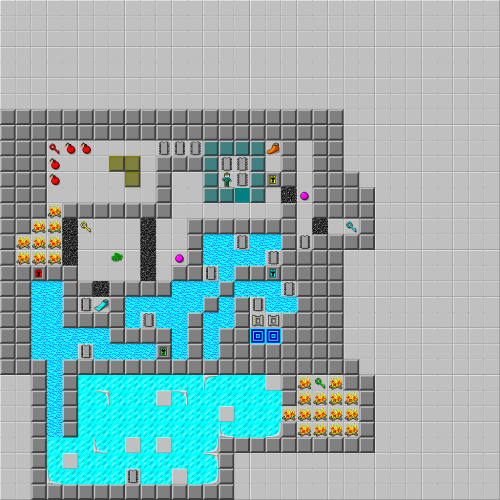
Move UR 3D to escape the blue walls, then head west and take the items near the blob and use them to collect the fire boots, chip and blue key, in that order, from the beginning.
Escape the blob and move to the three blocks in the north center; push blocks 3 and 2 out of the way to the chips, then use block 1 to reach the red key. Open the red lock and swim to the south, and take the south swim to the ice for a green key which opens a green lock clogging the water path to the exit.
Strategy[edit]
When dealing with single blobs, strategy is frequently just as important as luck. The journey to the three items can lose up to [1], and with perfection after the second run past the blob, as much as [4] can be expended, as this time is a 109.8. In the latter case, prefer to wait rather than risk even a 1/4 chance of death, unless the next move can also put Chip in danger - at which point it is best to simply force an immediate decision, which will reduce the boosting requirements in the second half of Bea's Den.
Full level map[edit]
Walkthrough[edit]
| Previous Level | Current Level | Next Level |
|---|---|---|
| ← Naomi's Bug Collection | Bea's Den | Force World → |
- Chip's Challenge Level Pack 2 Levels
- Levels designed by Paul Hobden
- Levels with casual difficulty 1 (MS)
- Levels with bold execution difficulty 1 (MS)
- Levels with bold routing difficulty 1 (MS)
- Levels with luck rating 1 (MS)
- Levels with casual difficulty 1 (Lynx)
- Levels with bold execution difficulty 1 (Lynx)
- Levels with bold routing difficulty 1 (Lynx)
- Levels with luck rating 1 (Lynx)
