Please create an account or Login! Have fun!
Now You See It: Difference between revisions
Jump to navigation
Jump to search
(Added full level map) |
Sharpeye468 (talk | contribs) m (Updated to new level template) |
||
| (7 intermediate revisions by 4 users not shown) | |||
| Line 1: | Line 1: | ||
{{Infobox Level | {{Infobox Level | ||
| | |pack = cc1 | ||
|level = 94 | |level = 94 | ||
| | |image = [[File:Level_94.png|300px]] | ||
| | |||
}} | }} | ||
| Line 31: | Line 15: | ||
==Full level map== | ==Full level map== | ||
[[ | [[File:Cc1_full_map_level_94.png|500px]] | ||
== Walkthrough == | == Walkthrough == | ||
Latest revision as of 04:36, 30 April 2020

| |
| Level set | Chip's Challenge 1 |
|---|---|
| Level number | 94 |
| Designer | Unknown |
| Password | EWCS |
| Chips | 7 required / 7 available |
| Time limit | 0 |
| MS (Scores) | |
| Bold time | [906] |
| Public time | [906] |
| Casual difficulty | ***** |
| Bold execution difficulty |
***** |
| Bold routing difficulty |
***** |
| Bold luck difficulty |
***** |
| Lynx (Scores) | |
| Bold time | [906] |
| Public time | [906] |
| Casual difficulty | ***** |
| Bold execution difficulty |
***** |
| Bold routing difficulty |
***** |
| Bold luck difficulty |
***** |
| Steam (Scores) | |
| Bold time | 0 |
| Public time | 0 |
| Casual difficulty | ***** |
| Bold execution difficulty |
***** |
| Bold routing difficulty |
***** |
| Bold luck difficulty |
***** |
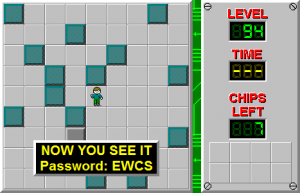
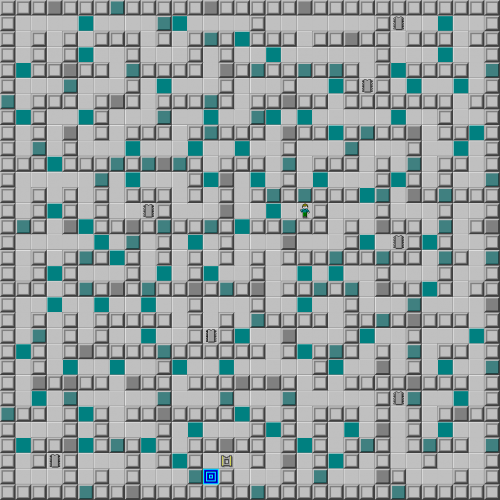
Now You See It is the 94th level in Chip's Challenge 1. Unlike themed invisible wall levels such as Vanishing Act, Now You See It is constructed of hidden walls and blue walls, which make this level easy unless Chip gets lost. If Chip gets lost, however, the route directly to the exit from the start is 4L 2U 2R 2U 12L 2U 2L 16D 5R 4D 2R 3D 2R 3U 4R 2U 2R 5D 2L U 2L D. The full route is:
- Chip 1: 4L 2D 2R 2D (2D 4R 2:[2D 2L] 2:[2U 2L] 2D).
- Chips 2-4: 2U 2L 4U 2R 4U 4R (6R 2D 3R 2U L 2U 4L 4U, 2D 2L 2D 4R [4D 2R], 2U 2R 4D 2R 6D 3R 6D 3L 2D 3R 2D 2L D 2L UL 4U).
- Chip 5: 4L 2D 4L (4D 2L 2U 4L 2D 2R).
- Chip 6: 8L 2U (2U 2R 2U 2L 2U 4R 2D 2R 2U 4R 2D 8R 2D).
- Chip 7: 2L 12D (2L 6D 2R 2D 2L 3D 2R U).
- Exit: 4D 4R 4D 2R 3D 2R 3U 4R 2U 2R 5D 2L U 2L D.
Full level map[edit]
Walkthrough[edit]
| Previous Level | Current Level | Next Level |
|---|---|---|
| ← Roadsign | Now You See It | Four Square → |
Categories:
- Chip's Challenge 1 Levels
- Levels by unknown designers
- Levels with casual difficulty 2 (MS)
- Levels with bold execution difficulty 3 (MS)
- Levels with bold routing difficulty 1 (MS)
- Levels with casual difficulty 2 (Lynx)
- Levels with bold execution difficulty 3 (Lynx)
- Levels with bold routing difficulty 1 (Lynx)
- Levels with casual difficulty 2 (Steam)
- Levels with bold execution difficulty 3 (Steam)
- Levels with bold routing difficulty 1 (Steam)
- Untimed levels
