Please create an account or Login! Have fun!
BuggyWall: Difference between revisions
Tylersontag (talk | contribs) |
mNo edit summary |
||
| (5 intermediate revisions by 3 users not shown) | |||
| Line 1: | Line 1: | ||
{{Infobox Level | {{Infobox Level | ||
|pack = cclp2 | |||
| | |||
|level = 75 | |level = 75 | ||
| | |image = [[File:CCLP2 Level 75.png|300px]] | ||
| | |||
}} | }} | ||
'''BuggyWall''' | '''BuggyWall''' is the 75th level in [[Chip's Challenge Level Pack 2]]. This level was not intended to be a particular challenge, and a designer error makes it even easier. | ||
While the [[boosting]] is tedious, Chip has as much time as he needs, or is on the clock, to collect the chips, and has [1] to spare for the bold time. The challenges involved with the boosting are to hit the [[recessed wall]]s and, secondly, to [[spring slide]] in the allowed locations. Chips 2-6, 9-12 and 15, in the order of collecting, permit spring slides. With all 15 chips, dive through the second [[socket]] between chips 3 and 4, ignoring the [[yellow key]]. | While the [[boosting]] is tedious, Chip has as much time as he needs, or is on the clock, to collect the chips, and has [1] to spare for the bold time. The challenges involved with the boosting are to hit the [[recessed wall]]s and, secondly, to [[spring slide]] in the allowed locations. Chips 2-6, 9-12 and 15, in the order of collecting, permit spring slides. With all 15 chips, dive through the second [[socket]] between chips 3 and 4, ignoring the [[yellow key]]. | ||
Without stopping, take the blue, then green and [[red key]]s, and then move north and east to exit the level. Notice that | Without stopping, take the blue, then green and [[red key]]s, and then move north and east to exit the level. Notice that one of the [[green lock]]s has been accidentally substituted for a [[yellow lock]], so Chip can exit without requiring a yellow key in this sector only. | ||
==Full level map== | |||
[[File:Cclp2_full_map_level_75.png|500px]] | |||
== Walkthrough == | == Walkthrough == | ||
Latest revision as of 04:43, 30 April 2020

| |
| Level set | Chip's Challenge Level Pack 2 |
|---|---|
| Level number | 75 |
| Designer | Paul Hobden |
| Password | LPXZ |
| Chips | 15 required / 15 available |
| Time limit | 150 |
| MS (Scores) | |
| Bold time | 113 |
| Public time | 113 |
| Casual difficulty | ***** |
| Bold execution difficulty |
***** |
| Bold routing difficulty |
***** |
| Bold luck difficulty |
***** |
| Lynx (Scores) | |
| Bold time | 109 |
| Public time | 109 |
| Casual difficulty | ***** |
| Bold execution difficulty |
***** |
| Bold routing difficulty |
***** |
| Bold luck difficulty |
***** |
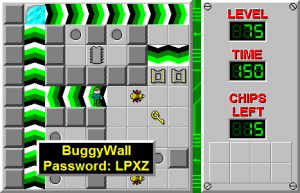
BuggyWall is the 75th level in Chip's Challenge Level Pack 2. This level was not intended to be a particular challenge, and a designer error makes it even easier.
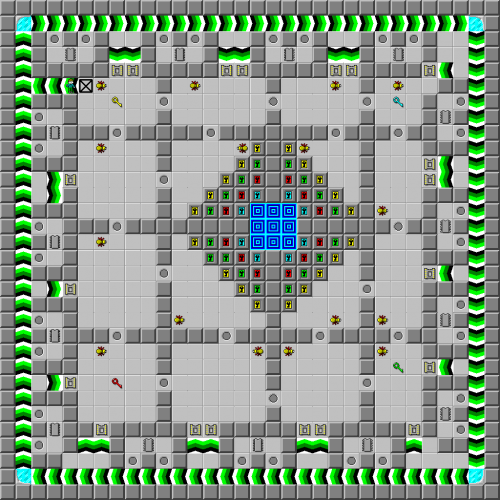
While the boosting is tedious, Chip has as much time as he needs, or is on the clock, to collect the chips, and has [1] to spare for the bold time. The challenges involved with the boosting are to hit the recessed walls and, secondly, to spring slide in the allowed locations. Chips 2-6, 9-12 and 15, in the order of collecting, permit spring slides. With all 15 chips, dive through the second socket between chips 3 and 4, ignoring the yellow key.
Without stopping, take the blue, then green and red keys, and then move north and east to exit the level. Notice that one of the green locks has been accidentally substituted for a yellow lock, so Chip can exit without requiring a yellow key in this sector only.
Full level map[edit]
Walkthrough[edit]
| Previous Level | Current Level | Next Level |
|---|---|---|
| ← Chip Search | BuggyWall | Fire Bugs → |
- Chip's Challenge Level Pack 2 Levels
- Levels designed by Paul Hobden
- Levels with casual difficulty 1 (MS)
- Levels with bold execution difficulty 2 (MS)
- Levels with bold routing difficulty 1 (MS)
- Levels with casual difficulty 1 (Lynx)
- Levels with bold execution difficulty 2 (Lynx)
- Levels with bold routing difficulty 1 (Lynx)
