Please create an account or Login! Have fun!
Blocked Trap: Difference between revisions
Indyindeed (talk | contribs) m (note: fix for lynx section needs to be made) |
mNo edit summary |
||
| (6 intermediate revisions by one other user not shown) | |||
| Line 1: | Line 1: | ||
{{Infobox Level | {{Infobox Level | ||
|pack = cclp2 | |||
| | |||
|level = 109 | |level = 109 | ||
| | |image = [[File:CCLP2 Level 109.png|300px]] | ||
| | |||
}} | }} | ||
| Line 33: | Line 16: | ||
==Full level map== | ==Full level map== | ||
[[ | [[File:Cclp2_full_map_level_109.png|500px]] | ||
== Walkthrough == | == Walkthrough == | ||
Latest revision as of 04:51, 30 April 2020

| |
| Level set | Chip's Challenge Level Pack 2 |
|---|---|
| Level number | 109 |
| Designer | Dave Borgman |
| Password | OSCZ |
| Chips | 0 required / 0 available |
| Time limit | 600 |
| MS (Scores) | |
| Bold time | 567 |
| Public time | 567 |
| Casual difficulty | ***** |
| Bold execution difficulty |
***** |
| Bold routing difficulty |
***** |
| Bold luck difficulty |
***** |
| Lynx (Scores) | |
| Bold time | 569 |
| Public time | 567 |
| Casual difficulty | ***** |
| Bold execution difficulty |
***** |
| Bold routing difficulty |
***** |
| Bold luck difficulty |
***** |
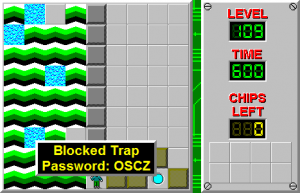
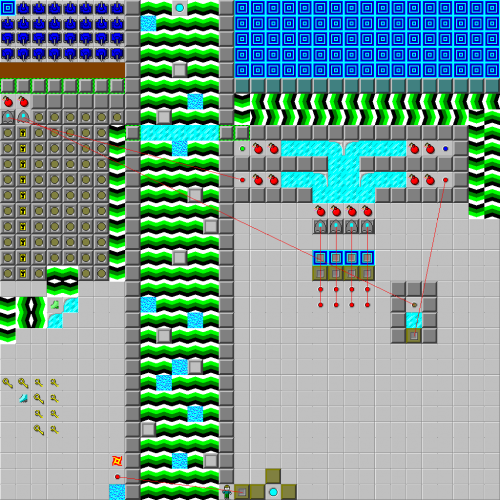
Blocked Trap is the 109th level in Chip's Challenge Level Pack 2. Blocked Trap is one of those very hard levels of which the difficulty can easily be seen, even from a full map. This is a trait of all 5-rated levels, and pushes this level just over the top. In order to complete it, Chip must find the hidden red buttons to the clone machines to clone gliders, then the remaining hidden yellow keys, the safe way through the yellow locks, and then how to get the tanks out of the corner.
There are multiple ways to perform the glider cloner section of the level. The simplest route, worth 565, uses two blocks to redirect some of the cloned gliders into the blue button and then traps them in that corridor, which does a lot of the work for Chip. Escape the starting slalom, then move the caught block between the rows of red buttons and clone blocks, thus revealing three of the four hidden buttons; press buttons 2 and 3 before moving the block R 5U. Now, play the other block created 5L 5U 2R, then R behind the sliding glider, and as the two gliders move northeast, shove it R again to permanently trap them.
Follow the path over the force floors, then off the two ice spaces, and south over four hidden keys. Continue (LU) ULURUL (2L), up between the blocked sides of the ice corners for the suction boots, and then 2L and north through the safe yellow locks. All remaining locks have traps under them.
Remove dirt 1, then DR and remove dirt 2, and DR again, then wait for the tanks to switch twice and play U. Failure to wait for the second switch causes the tanks to kill Chip while he is waiting. On the next switch, the exit is free.
The bold route of 567 is slightly more complex; move the first cloned block only 3L, then walk D (R [1/2] R) to clone some additional gliders while waiting for the others to clear away. The second block will then trap three gliders on the blue button, which switches the tanks a lot faster, so a different route to the exit is required. Remove both dirt 1 and 2 immediately, then hide under dirt 3 and remove it after the tanks switch three times. The tanks close inwards on the gap towards the exit, but not quite quick enough to stop Chip.
Full level map[edit]
Walkthrough[edit]
| Previous Level | Current Level | Next Level |
|---|---|---|
| ← Tricks | Blocked Trap | It's a Kind of Magic → |
- Chip's Challenge Level Pack 2 Levels
- Levels designed by Dave Borgman
- Levels with casual difficulty 3 (MS)
- Levels with bold execution difficulty 1 (MS)
- Levels with bold routing difficulty 4 (MS)
- Levels with casual difficulty 3 (Lynx)
- Levels with bold execution difficulty 1 (Lynx)
- Levels with bold routing difficulty 4 (Lynx)
- Levels unplayable in Lynx
