Please create an account or Login! Have fun!
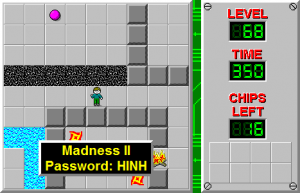
Madness II

| |
| Level set | Chip's Challenge Level Pack 2 |
|---|---|
| Level number | 68 |
| Designer | Dave Borgman |
| Password | HINH |
| Chips | 16 required / 21 available |
| Time limit | 350 |
| MS (Scores) | |
| Bold time | 277 |
| Public time | 277 |
| Casual difficulty | ***** |
| Bold execution difficulty |
***** |
| Bold routing difficulty |
***** |
| Bold luck difficulty |
***** |
| Mouse Required | Note: This level's bold route requires use of the mouse. |
| Lynx (Scores) | |
| Bold time | 280 |
| Public time | 276 |
| Casual difficulty | ***** |
| Bold execution difficulty |
***** |
| Bold routing difficulty |
***** |
| Bold luck difficulty |
***** |
Madness II is the 68th level in Chip's Challenge Level Pack 2. Unlike the rather simple Madness I, Madness II requires instant responses, exact timing, some luck, and some logic. There are two distinct routes through Madness II at its highest level; in slower routes, simply clone one block at a time. One path uses only the arrow keys and one utilizes the Mouse Panel Glitch to perform two rams, but the latter - in addition to the increased difficulty of using the mouse - requires several alterations which make the route more difficult.
276 route[edit]
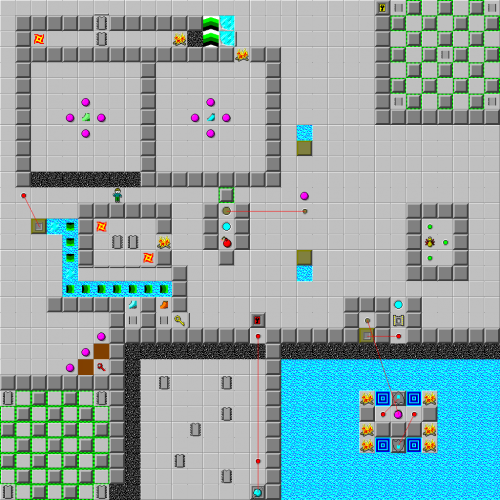
Clone one block and cover it, then clone two blocks, move the extant block D and remove the dirt. For the next stage, clone three blocks and remove the dirt with [1/2] RL, taking advantage of slide delay to survive the sliding block - a spring step dirty trick. Ram this block with -R, then play DR and revive the rammed block with U, and step L [1/2] R onto the resulting dirt. This U move loses no time, as the boost will catch Chip up with the other theoretical path, similar to the mechanics of the spring step.
Step L to move the last remaining block, then clone six blocks, move the loose block D, remove the dirt without waiting (there is sufficient slide delay that no 10 m/s move is necessary), and continue to use the dirty trick to push the train further down the river: LUR 2:[[1/2] DU] R [1/2] DU -D. As with the other ram, shove the block L to continue it down the path, then move U [1/2] D to remove its dirt space. Move the loose block (the last one remaining) R towards the train, then collect the red key to the left before moving the block onto the train and picking up everything in both alcoves.
Above the start, hidden in the center of the bouncing pink balls, is a pair of suction boots. Play down to the circling fireballs for two chips, then into the red lock and over the red button, which will unfortunately begin to clone walkers. Collect the two chips nearest, then collect the three chips below in any order that does not finish with the highest as the walkers dictate, and then move to the southwest corner to collect the four chips. There can be no delays here. On the way out, try to steal the chip in the northwest corner; it's not as unlikely as it seems, and [2] can be spared in this case.
Now, run to the top of the level, past the ball on the brown button, and sneak into the second ball room, this time with hidden flippers. Move across the ice corner, steal the last two chips from the fireball, then sneak back around to the toggle wall, pass the teleport, bust through the socket and move DR 3D to avoid running into a glider as you exit.
277 route[edit]
Several things change when the mouse is used. The first ram is the harder of the two: to pull it off successfully, wait [1/2] before clicking [-R *D], which will cause [*D R] to function as a spring step. Make the following UL key moves very distinct, as otherwise the mouse will trigger during Chip's [1/2] wait and he will move -R when he lands.
Because Chip gains [2] in this section, a different path through the pink balls guarding the red key is necessary. Push the loose block D to account for this.
Once the river is down to one water space, continue down the alternate route: push the last block 3D, collect the red key using specifically DUD (as the dirt U off the key causes a ball to force a [1] wait if one or both spaces are left alone), then walk 2L U 2L and sneak the block back out to the final water.
The next change is that Chip now has [1] to spare after the first pass through the walker room (use it well), but in return has no spare moves when diving in to steal the last chip.
The last change is at the very end: Chip has [6] to spare, [4] of which will contribute to increasing the time from 276.8 to 277.6. [1] has to be spent waiting for each of the toggle wall and trap to open, so push the block above the ball 4D onto the brown button, which will erase both waits in return for a [1] loss and increase the time to 277.8. In addition to saving [1], this makes running to the exit much easier: overshooting the path out of the teleport by moving 2D off the socket will cause Chip to be killed, and having to wait [1] just before teleporting will make this mistake more likely since more factors are at work.
Full level map[edit]
Walkthrough[edit]
| Previous Level | Current Level | Next Level |
|---|---|---|
| ← The One Sensible Chip | Madness II | So Many Chips! → |
- Chip's Challenge Level Pack 2 Levels
- Levels designed by Dave Borgman
- Levels with casual difficulty 3 (MS)
- Levels with bold execution difficulty 5 (MS)
- Levels with bold routing difficulty 5 (MS)
- Levels with luck rating 3 (MS)
- Levels with casual difficulty 3 (Lynx)
- Levels with bold execution difficulty 3 (Lynx)
- Levels with bold routing difficulty 4 (Lynx)
- Levels unplayable in Lynx
- Levels quicker in Lynx than MS
