Please create an account or Login! Have fun!
Microcosm: Difference between revisions
m (added designer to infobox) |
mNo edit summary |
||
| Line 1: | Line 1: | ||
{{Infobox Level | {{Infobox Level | ||
| | |pack = cclp2 | ||
|level = 134 | |||
|image = [[File:CCLP2 Level 134.png|300px]] | |image = [[File:CCLP2 Level 134.png|300px]] | ||
|hint = The middle square can be thought of as a map, if you want. | |hint = The middle square can be thought of as a map, if you want. | ||
}} | }} | ||
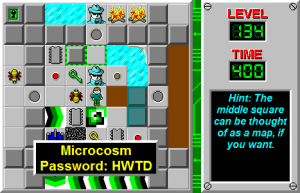
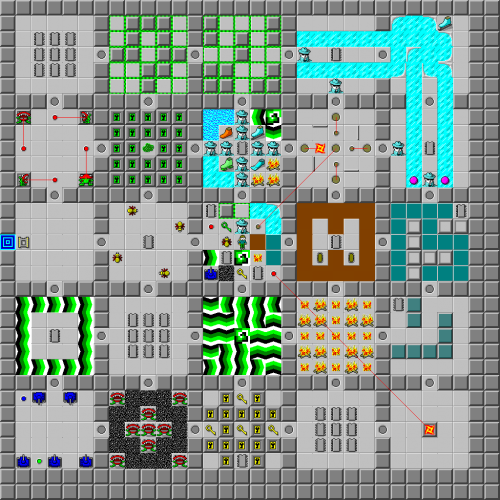
'''Microcosm''' is the 134th level in [[Chip's Challenge Level Pack 2]]. As noted by the hint, the center square is a "map" of the major features in the other 24 cells of Microcosm: hidden [[fire]] at coordinate [3, 3] in this room means there is some hidden [[fire]] in coordinate [3, 3] of the 5x5 sub[[grid]]; the [[green key]] at [1, 1] means there's [[green lock]]s in it; etcetera. While [[Tyrethali Ansrath]] made Microcosm, this "map grid" type of level was later copied by other designers, including [[Eric Schmidt]]. | '''Microcosm''' is the 134th level in [[Chip's Challenge Level Pack 2]]. As noted by the hint, the center square is a "map" of the major features in the other 24 cells of Microcosm: hidden [[fire]] at coordinate [3, 3] in this room means there is some hidden [[fire]] in coordinate [3, 3] of the 5x5 sub[[grid]]; the [[green key]] at [1, 1] means there's [[green lock]]s in it; etcetera. While [[Tyrethali Ansrath]] made Microcosm, this "map grid" type of level was later copied by other designers, including [[Eric Schmidt]]. | ||
Latest revision as of 04:58, 30 April 2020

| |
| Level set | Chip's Challenge Level Pack 2 |
|---|---|
| Level number | 134 |
| Designer | Tyrethali Ansrath |
| Password | HWTD |
| Hint | The middle square can be thought of as a map, if you want. |
| Chips | 39 required / 39 available |
| Time limit | 400 |
| MS (Scores) | |
| Bold time | 361 |
| Public time | 361 |
| Casual difficulty | ***** |
| Bold execution difficulty |
***** |
| Bold routing difficulty |
***** |
| Bold luck difficulty |
***** |
| Lynx (Scores) | |
| Bold time | 359 |
| Public time | 359 |
| Casual difficulty | ***** |
| Bold execution difficulty |
***** |
| Bold routing difficulty |
***** |
| Bold luck difficulty |
***** |
Microcosm is the 134th level in Chip's Challenge Level Pack 2. As noted by the hint, the center square is a "map" of the major features in the other 24 cells of Microcosm: hidden fire at coordinate [3, 3] in this room means there is some hidden fire in coordinate [3, 3] of the 5x5 subgrid; the green key at [1, 1] means there's green locks in it; etcetera. While Tyrethali Ansrath made Microcosm, this "map grid" type of level was later copied by other designers, including Eric Schmidt.
Take the green key, chip, and then hold the south key to pick up another two chips and yellow key; hold south again to blast through room 18's force floor circle and swap yellow keys to a chip. Take the nine chips to the right of this, move between the real blue walls, through the hidden fire room, and onto the chip guarded by the paramecia on either side.
Move either D or U, then 2R into room 15's fake blue walls, and then continue through rooms 10 and 9 into an automated trap release with a fireball. Turn north, then move through the toggle walls in room 3; the change will stop Chip at the very edge. Collect only the chip, then move through room 7 and into room 2. From the recessed wall, move 2U 2L [6] U, clean out room 1, then cut all the way down through rooms 6, 11 and 16. Finish by walking through rooms 17 and 12, then come back to the exit at room 11.
Full level map[edit]
Walkthrough[edit]
| Previous Level | Current Level | Next Level |
|---|---|---|
| ← Block Maze | Microcosm | Zartacla → |
- Chip's Challenge Level Pack 2 Levels
- Levels designed by Tyrethali Ansrath
- Levels with casual difficulty 3 (MS)
- Levels with bold execution difficulty 1 (MS)
- Levels with bold routing difficulty 3 (MS)
- Levels with casual difficulty 3 (Lynx)
- Levels with bold execution difficulty 1 (Lynx)
- Levels with bold routing difficulty 3 (Lynx)
- Levels unplayable in Lynx
